
Hey everyone out there in Internet land!!! I’m a huge fan of old/vintage/beat up/awesome/whatever Fender amps. Whenever I find one that needs to be saved I just can’t resist. Which brings me to this buckin’ Bronco.
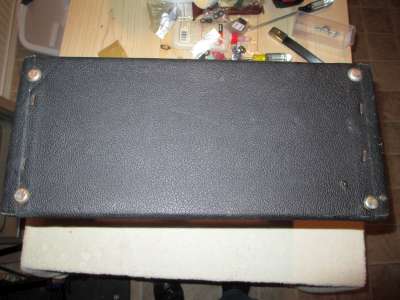
Here’s the “after” shot so you can see that the patient survived as it gets pretty gross through this process.

This is a 1973 Fender Bronco Amp. For those of you not in-the-know this is the exact same circuit as a Vibro Champ, just with a different label to be sold in cute matching sets with the Bronco guitar. See, look how cute this is in an add from 1972.

See? I believe the kids would call that “totes adorbs.”
Anyway…so when I received the amp it was <sarcasm>very carefully packaged</sarcasm> in high-tech wrapping material. I believe the term for this substance is “t-shirt”

No really – that was the only packing material in the box. But, at least the speaker was in good shape though……

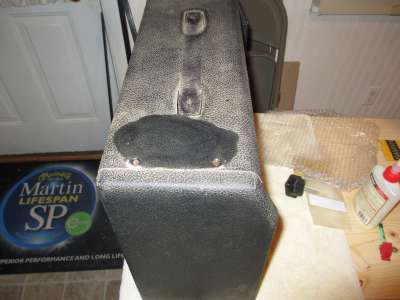
Hmmm…well…………….at least the cabinet was nice and clean?

Hmmm…clearly it just needs some love. A few hours, a bit of TLC, and we’ll have this rocking like it’s 1973.
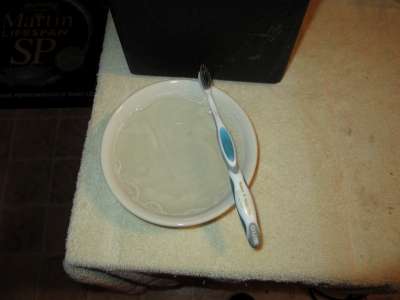
So, the first thing that I wanted to do with this guy is get it cleaned up. One way to do this is with just a *hint* of liquid dish soap in some water, like this. This picture is important for later I swear:
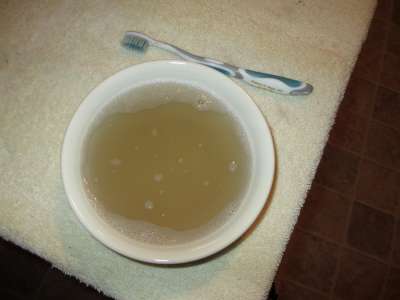
Since tolex (the material that most amps and guitar cases are covered with) is textured you can’t just use brute force. Working a sponge or paper towel on the material too hard will ruin the texture and you’ll still have dirt in the cracks. A toothbrush is killer. So I cleaned one tiny area just for demonstration:
And this how dirty the water got from just that small spot…
After a few rounds with the toothbrush it turned out just fine. The inside of the cabinet was full of junk/dust/t-shirt residue so I taped off the (extremely fragile because the glue has been drying out the thin paper for 40+ years) tube chart so I could give the inside a good wipe down as well:
Here’s what it looked like after being cleaned up – even the bottom turned out nice:

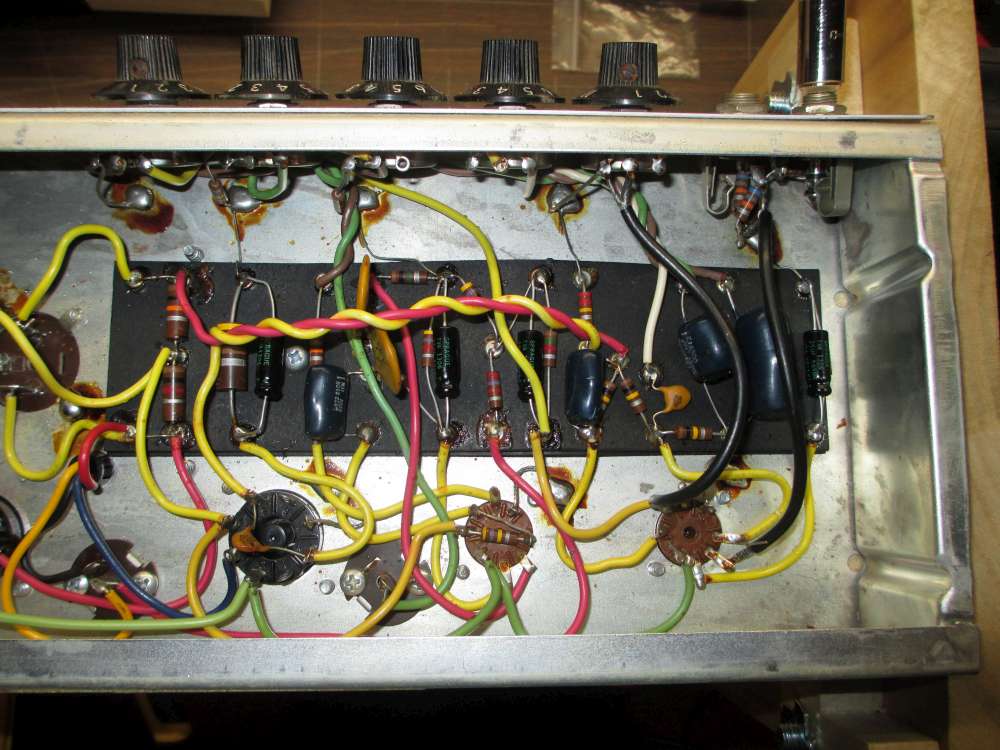
After cleaning the outside it was time to get the amp in good working order. Although the outside may have been dirty and the speaker was rotted through, the electronics were very clean and untouched – just what I like to see in something like this. You’re gonna have to take my word for it because for some reason I don’t have a before picture of the guts, but I do have an after (click for larger version):
However, with the chassis now out of the cabinet it’s obvious we need to do some more cleaning since I was never into the grunge-your-fingers-have-left-behind-for-40-years look.

The knobs themselves didn’t even escape – click the image to see the larger version on this for better detail.

The great news is that the tubes are vintage American RCA, the transformers are all original, and I just need to get a speaker installed so this can make noise again. But when I went to install the new speaker I noticed 2 of the studs were missing:

Now these aren’t just regular screws you can get at the hardware store – that would be way too easy. These are special two-portion screws where the top section has course threads to bite into the wood and the rest is threaded to accept a nut. Here’s a close-up:

Of course I have a bag of these laying around for just such an occasion so that was a quick enough fix. I installed a shiny new speaker and the amp should be ready to rock for another 42 years.